
Control a DC Motor with an L298N and an Arduino
 By Austin SmallUpdated November 15, 2026
Turn a knob and a DC motor speeds up, slows down and reverses, driven by an Arduino through an L298N motor driver, running in your browser before you build it. A pin can give 40 mA at most; a small motor draws about 150 mA running free and over an amp as it starts. The L298N switches the motor's own battery on and off for the Arduino, in either direction and as fast as it likes.

Try it first, no parts needed
This is the whole project, wired and running in your browser. Press Run simulation, then turn the knob: right of the middle the motor runs forward, left of it backward, faster the further you turn, and it stops near the middle.

The knob on A0
Centre stops the motor; right runs it forward, left backward. The sketch reads it every 200 ms.
Arduino Uno serial monitor115200 baud
What the code does
The sketch reads the knob five times a second, sets the motor's direction with IN1 and IN2 and its speed with ENA, and prints both on the Serial Monitor.
// Drive a DC motor through an L298N with a knob. Right of centre it runs forward,
// left of centre backward, faster the further you turn; near the centre it stops.
const int ENA = 9;   // speed: PWM
const int IN1 = 8;   // direction
const int IN2 = 7;
const int KNOB = A0;

const int DEAD_BAND = 40;   // this close to the centre, the motor stops
const int MAX_SPEED = 210;  // about 5.3 V average on 9 V: within a TT motor's 3-6 V

void setup() {
  Serial.begin(115200);
  pinMode(ENA, OUTPUT);
  pinMode(IN1, OUTPUT);
  pinMode(IN2, OUTPUT);
}

void loop() {
  int offset = analogRead(KNOB) - 512;  // -512 (left) to 511 (right)
  int speed = 0;
  if (offset > DEAD_BAND) {
    digitalWrite(IN1, HIGH);  // forward
    digitalWrite(IN2, LOW);
    speed = map(offset, DEAD_BAND, 511, 0, MAX_SPEED);
    Serial.print("Forward, speed ");
  } else if (offset < -DEAD_BAND) {
    digitalWrite(IN1, LOW);   // backward
    digitalWrite(IN2, HIGH);
    speed = map(-offset, DEAD_BAND, 512, 0, MAX_SPEED);
    Serial.print("Backward, speed ");
  } else {
    digitalWrite(IN1, LOW);   // stop
    digitalWrite(IN2, LOW);
    Serial.print("Stopped, speed ");
  }
  analogWrite(ENA, speed);
  Serial.println(speed);
  delay(200);
}const int ENA = 9; // speed: PWMThe three pins wired to the L298N. ENA, the enable, sets the speed, so it must be a PWM pin: on an Uno, 3, 5, 6, 9, 10 or 11. IN1 and IN2 set the direction and can be any digital pins.
const int MAX_SPEED = 210; // about 5.3 V average on 9 V: within a TT motor's 3-6 VThe fastest the sketch will go, out of 255. ST gives the L298's drop as about 2.5 V typically at 1 A, so a 9 V battery gives the motor pulses of about 6.45 V, and 210 of 255 averages about 5.3 V, within a TT motor's 3 to 6 V. That's an estimate, not a limit: it uses ST's typical drop at 1 A, its datasheet's reference point, while a TT motor draws about 160 mA running free and over an amp starting or stalled, so the real drop moves with the load, and a battery's voltage falls as it runs down. For another supply or motor, start lower and raise it while the motor stays within its rating.
int offset = analogRead(KNOB) - 512; // -512 (left) to 511 (right)analogReadgives 0 to 1023 for 0 to 5 V on A0. Taking away 512 makes the knob's middle 0: negative to the left, positive to the right.digitalWrite(IN1, HIGH); // forwardRight of the middle: IN1 HIGH and IN2 LOW make the L298N drive the motor forward. Swap them and it runs backward, as the next branch does.
speed = map(offset, DEAD_BAND, 511, 0, MAX_SPEED);mapturns how far right the knob is, from the edge of the dead band to fully right, into a speed from 0 to 210.digitalWrite(IN1, LOW); // stopNear the middle: both inputs LOW and, below, a speed of 0. With ENA LOW the L298N lets go of the motor, which coasts to a stop.
analogWrite(ENA, speed);Sets the speed: ENA is switched on for
speedout of every 255 parts of a cycle, about 490 times a second on pin 9. The motor turns at a speed set by the average voltage; see how it works.
Build it on an Arduino
Now with real parts. Check which pin is which, wire it, get the code, then upload it and turn the knob. Using an ESP32 board? It has its own guide →
Which pin is which: the L298N module pinout
The module has three rows of screw terminals: one for each motor on the sides, and power along the front. Beside the power terminal is a row of six pins: the inputs. ENA and ENB come with jumpers on them; take ENA's off to set the motor's speed from the Arduino.

| Drives | Two DC motors, each forward, reverse, fast stop or coast |
|---|---|
| Motor supply | 5 to 35 V on the 12V terminal (the L298 itself takes up to 46 V) |
| Current | 2 A at most for each motor, the L298's absolute maximum |
| Voltage lost | 1.8 to 3.2 V between the supply and the motor at 1 A |
| Inputs | HIGH from 2.3 V, LOW up to 1.5 V: 5 V and 3.3 V boards both work |
| 5 V out | From its regulator, with the 5V-EN jumper on and 7 V to under 12 V on 12V |
You'll need
- An Arduino Uno and its USB cable
- An L298N motor driver module
- A small DC motor rated for 6 V or more, such as a TT gear motor (Adafruit 3777: 3 to 6 V)
- A 9 V battery and a snap connector, or six AA cells in a holder
- A 10 kΩ potentiometer, the knob
- Jumper wires, a breadboard for the knob, and a small screwdriver for the terminals
- Software to upload the sketch to the Uno: either Cirkit Designer, free in your browser, or the Arduino IDE, a free download for Windows, macOS and Linux
Wire it
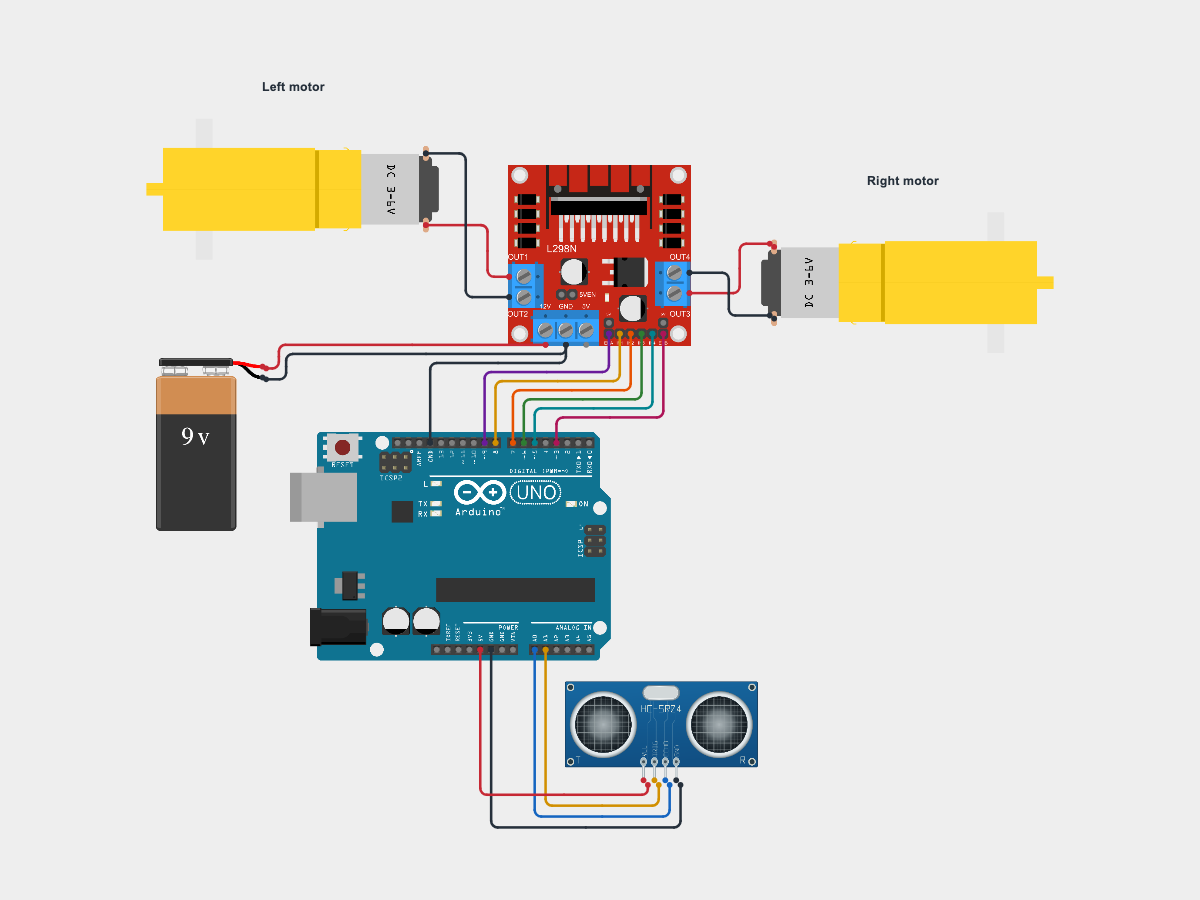
Take the jumper off ENA first. Then four wires from the L298N to the Uno, the battery to the power terminal, the motor to OUT1 and OUT2, and the knob to the Uno. Connect the battery last.
Tap a connection to see it on the circuit.
From Connect to Show L298N GND Uno GND Show L298N ENA Uno pin 9 Show L298N IN1 Uno pin 8 Show L298N IN2 Uno pin 7 Show Battery + L298N 12V Show Battery − L298N GND Show L298N OUT1 Motor lead Show L298N OUT2 Motor's other lead Show Knob outer leg Uno 5V Show Knob middle leg Uno A0 Show Knob other outer leg Uno GND Show The L298N's GND goes to the battery's − and to the Uno's GND. The inputs are measured from GND, so without the shared ground the L298N can't tell HIGH from LOW. Leave the 5V-EN jumper on: with 9 V on 12V, the module makes its own 5 V. Don't connect its 5V terminal to the Uno, which has USB power.
Get the code
I'm using:Steps 2 and 3 follow the tool you pick.
The project opens with the sketch already in it. It needs no library.
No Arduino IDE yet? Download it free for Windows, macOS or Linux.
The sketch needs no library. Copy it into a new sketch:
How it works line by line is in what the code does, above.
Upload and check it
Plug in your Uno. In Cirkit, open the Build tab, then Upload firmware: click Select Port and pick your Uno, then Upload to Device. The first time, Cirkit asks you to install Cirkit Create Agent, a small desktop helper that lets it reach the board over USB. Then open Upload output and serial monitor and click Start Serial Monitor. Connect the battery last, with the knob in the middle.
Show me where to click in Cirkit
 DC motor and L298N on an Arduino UnoDesignCodeSimulateBuildShare
Select a device port
Select the device port for uploading code and serial communications
COM3 (Arduino Uno)- Open Build
- Choose Upload firmware
- Click Select Port
- Pick COM3 (Arduino Uno)
- Click Upload to Device
- Open Upload output and serial monitor
- Click Start Serial Monitor
In the Arduino IDE, choose Arduino Uno and its port from the board menu, press Upload, then open the Serial Monitor and set it to 115200 baud. Connect the battery last, with the knob in the middle.
Show me where to click in the Arduino IDE
KnobMotor.ino// Drive a DC motor through an L298N with a knob. Right of centre it runs forward, // left of centre backward, faster the further you turn; near the centre it stops. const int ENA = 9; // speed: PWM const int IN1 = 8; // direction const int IN2 = 7; const int KNOB = A0;
OutputSerial Monitor115200 baudCompiling sketch...
Sketch uses 2710 bytes (8%) of program storage space. Maximum is 32256 bytes.
Global variables use 236 bytes (11%) of dynamic memory, leaving 1812 bytes for local variables. Maximum is 2048 bytes.
Uploading...
Stopped, speed 0
Stopped, speed 0
Forward, speed 55
Forward, speed 135
Forward, speed 210
Forward, speed 210
Done uploading.
- Click the board menu
- Pick Arduino Uno on COM3
- Click Upload
- Wait for Done uploading
- Click Serial Monitor
- Check it is set to 115200 baud
It works when:
- The L298N's power LED lights when the battery is connected.
- With the knob in the middle the motor stands still and the Serial Monitor prints
Stopped, speed 0. - Turning right, the motor runs forward, faster the further you turn, up to
Forward, speed 210; turning left, it runs backward.
Device SerialStopped, speed 0Stopped, speed 0Forward, speed 55Forward, speed 135Forward, speed 210Forward, speed 210OutputSerial MonitorStopped, speed 0Stopped, speed 0Forward, speed 55Forward, speed 135Forward, speed 210Forward, speed 210Not working? If the motor doesn't turn, see troubleshooting.
Troubleshooting
Find your symptom; the checks under it run from the most common cause down.
The motor doesn't turn
If the Serial Monitor prints Forward with a speed as you turn the knob, the Uno is running and the trouble is between it and the motor. Check, in order:
- The L298N's power LED is on. If not, the battery isn't on 12V and GND, or it's flat.
- The L298N's GND is wired to the Uno's GND. It goes to the battery's − as well.
- ENA is on pin 9, IN1 on 8 and IN2 on 7. Those are the pins in the sketch.
- The knob is turned well past the middle. A TT motor is rated from 3 V: on a 9 V battery, a speed of about 120. Below that it may turn slowly or not at all.
- The motor's leads are tight in OUT1 and OUT2. Tug each one gently.
It runs one way but not the other, or at one speed only
- Only one way: IN1 or IN2 is loose or on the wrong pin.
- Full speed only, whatever the knob: the jumper is still on ENA, holding it at 5 V. Take it off; ENA goes to pin 9 alone.
- Never stops: the knob's middle leg is loose, or not on A0, so A0 reads whatever it picks up.
It runs backward when the knob turns right
- The motor's leads are the other way round. Swap them in OUT1 and OUT2. A DC motor has no wrong way to wire it: reversing it reverses its direction.
- Or the knob's outer legs are swapped. Swap the wires on 5V and GND.
The motor is slow or weak, or slows when it's loaded
- The battery is running down. A 9 V battery can't give much current: use a fresh one, or six AA cells.
- The L298N loses about 2.5 V. From a 6 V supply the motor gets only about 3.5 V, little for a 6 V motor. Use a 9 V supply, or a driver that loses less: see alternatives.
Nothing in the Serial Monitor, or garbled characters
- The Serial Monitor is set to 115200 baud. It must match
Serial.begin(115200)in the sketch.
How the L298N drives a motor
A DC motor turns one way with its leads on + and −, and the other way with them swapped. Inside the L298N, for each motor, four switches do the swapping: an H-bridge, named for its shape, with the motor across the middle. IN1 and IN2 choose which two switches close, and ENA lets them close at all.

The switches are transistors, which lose a little voltage: ST gives 1.8 to 3.2 V for the two in the path at 1 A, about 2.5 V typically. So from a 9 V battery the motor gets about 6.45 V.
Speed comes from ENA. analogWrite switches it on and off hundreds of times a second, PWM, and keeps it on for a share of each cycle. The motor's winding smooths the pulses, so it turns at the speed the average voltage gives, as Microchip's motor control note explains.

The figure under this follows the L298N in the running circuit.
- IN1, pin 8
- HIGH
- IN2, pin 7
- LOW
- ENA, pin 9
- PWM 82%
- Bridge
- Forward
- Motor
- +5.3 V
The motor: forward, switched on 82% of the time, averaging +5.3 V.
Limits
| L298N module | TT gear motor (Adafruit 3777) | |
|---|---|---|
| Voltage | 5 to 35 V on 12V; the L298 itself up to 46 V | 3 to 6 V |
| Current | 2 A at most for each motor: ST's absolute maximum for the L298, not a figure to run it at | About 160 mA running free at 6 V; 1.5 A stalled |
| Voltage lost | 1.8 to 3.2 V at 1 A, 4.9 V at most at 2 A | |
| Speed | 200 RPM ±10 % at 6 V; Adafruit measured 250 RPM with no load | |
| Inputs | LOW up to 1.5 V, HIGH from 2.3 V |
A motor draws far more as it starts or when it's held: this one 1.5 A, nearly ten times what it takes running free. Check that your driver and supply can give your motor's stall current.
L298N or another motor driver?
| Motor supply | Current per motor | Choose it for | |
|---|---|---|---|
| L298N module (this guide) | 5 to 35 V | 2 A at most | Bigger motors and higher voltages, with screw terminals and a 5 V regulator on the board |
| TB6612FNG breakout | 4.5 to 13.5 V | 1.2 A, 3 A peaks | Small motors from a 6 to 12 V battery, on a board a fraction of the size; logic 2.7 to 5 V |
| DRV8833 breakout | 2.7 to 10.8 V | 1.2 A; Adafruit limits it to 1 A, and 2 A peaks need that limit changed | TT motors from a few AA cells: Adafruit's choice for its TT motor, as it works down to 3 V |
L298N FAQ
How do I reverse the motor?
Swap IN1 and IN2: HIGH and LOW drive it one way, LOW and HIGH the other. You never need to swap its wires in code; that's what the H-bridge is for.
digitalWrite(IN1, LOW);   // backward
digitalWrite(IN2, HIGH);
How do I stop the motor quickly?
Set IN1 and IN2 the same with ENA HIGH: both of the motor's leads go to one side, GND with both LOW or the battery's + with both HIGH, which brakes it, ST's "fast motor stop". ST adds that braking must stay within the L298's 2 A. With ENA LOW instead, the motor is let go and coasts to a stop.
digitalWrite(IN1, LOW);   // fast stop: both leads on GND
digitalWrite(IN2, LOW);
analogWrite(ENA, 255);
What are the jumpers for?
The two on ENA and ENB hold them at 5 V, so the motors are always enabled; take one off to control that motor's speed with PWM. The 5V-EN jumper lets the module's regulator make 5 V from the 12V terminal. Handson Technology says to fit it for supplies under 12 V; above that, take it off and give the 5V terminal 5 V yourself, as the L298's logic needs 4.5 to 7 V.
Can I power the motor from the Arduino's 5V pin?
Not this way. A TT motor draws up to 1.5 A stalled, and the L298N needs a motor supply on its 12V terminal anyway. Give the motor its own battery, as this guide does, and keep the Uno on USB.
Why doesn't my motor reach full speed?
The L298N loses about 2.5 V, more as the current rises, so the motor gets less than the battery's voltage. A 9 V battery with the speed capped, as in this guide's sketch, suits a 6 V motor; for a 12 V motor, use a 12 V or higher supply.
Does the L298N work with an ESP32?
Yes: its inputs read HIGH from 2.3 V, so the ESP32's 3.3 V is enough. The ESP32 guideshows the wiring.
Simulating the L298N and DC motor in Cirkit Designer
Cirkit's L298N follows ST's truth table for both motors, with each input HIGH from 2.3 V and LOW up to 1.5 V. Its outputs lose ST's typical figures at 1 A, 1.35 V on the + side and 1.2 V on the − side, whatever the current. An enable with nothing wired to it acts as if its jumper were on. Its 5V terminal gives 5 V while the 12V terminal has 7 V or more and the 5V-EN jumper, a setting in its properties, is on.
The motor turns at about 33 RPM for each volt of its average, 200 RPM at 6 V, Adafruit's figure for that voltage, and warns when the average is above 6 V. It doesn't model load, current, torque, inertia or the stall current, so it starts and stops at once, and the 9 V battery doesn't sag. Both are tested on the Arduino Uno, the classic ESP32 and the ESP32-S3.
References
- ST L298 dual full-bridge driver datasheet
- Handson Technology: L298N dual H-bridge motor driver user guide
- ST L78M positive voltage regulators datasheet (the 78M05)
- Adafruit: DC gearbox (TT) motor, 200 RPM, 3 to 6 V (product 3777)
- Adafruit: TB6612 1.2 A DC/stepper motor driver breakout (product 2448)
- Adafruit: DRV8833 DC/stepper motor driver breakout (product 3297)
- Microchip AN905: brushed DC motor fundamentals
- Arduino: analogWrite() (PWM pins and frequencies)
- Arduino: analogRead()
- Arduino: map()
- Microchip ATmega328P datasheet, DS40002061B (40 mA at most from an I/O pin)
- Arduino IDE 2: uploading a sketch