
Turn a Servo with a Knob on an Arduino
 By Austin SmallUpdated November 12, 2026
Turn a servo with a knob on an Arduino, running in your browser before you build it. A hobby servo turns its horn to the angle you ask for, about 0 to 180°, and holds it there. It takes three wires, for power, ground and a signal of pulses whose length sets the angle. One small servo runs from the Uno's 5V, but bigger ones, or several, need a supply of their own.

Try it first, no parts needed
This is the whole project, wired and running in your browser: a knob on A0 sets the angle of a servo on pin 9. Press Run simulation, then turn the knob and watch the horn follow it.

The knob on A0
Turning the knob from end to end swings the servo from 0° to 180°.
Arduino Uno serial monitor115200 baud
What the code does
The sketch reads the knob, turns its position into an angle from 0 to 180°, and turns the servo to it.
// Turn the knob on A0: the servo on pin 9 follows it,
// from 0 to 180 degrees.
#include <Servo.h>

const int KNOB_PIN = A0;
const int SERVO_PIN = 9;

Servo servo;
int shownAngle = -1;

void setup() {
  Serial.begin(115200);
  // Pulses from 544 us (0 degrees) to 2400 us (180).
  servo.attach(SERVO_PIN);
}

void loop() {
  int reading = analogRead(KNOB_PIN);  // 0 to 1023
  int angle = map(reading, 0, 1023, 0, 180);
  servo.write(angle);

  // Print only when the angle changes.
  if (angle != shownAngle) {
    shownAngle = angle;
    Serial.print(F("A0="));
    Serial.print(reading);
    Serial.print(F(" angle="));
    Serial.println(angle);
  }
  delay(15);  // give the servo time to get there
}Servo servo;A
Servoobject, one for each servo; it remembers the pin and the angle.servo.attach(SERVO_PIN);Starts the pulses on pin 9: one every 20 ms, from 544 µs for 0° to 2400 µs for 180°, until the sketch asks for another angle.
int angle = map(reading, 0, 1023, 0, 180);Turns the knob's reading, 0 to 1023, into an angle from 0 to 180°.
servo.write(angle);Sets the pulse length for that angle. The servo turns there and holds it; the sketch carries on at once.
delay(15); // give the servo time to get thereWaits 15 ms before the next reading, as Arduino's own Knob example does. The servo keeps turning while the sketch reads on; a full 180° turn takes about 0.3 s.
Build it on an Arduino
Now with real parts. Check which wire is which, wire it, get the code, then upload it and turn the knob. Using an ESP32 board? It has its own guide →
Which wire is which: the servo pinout
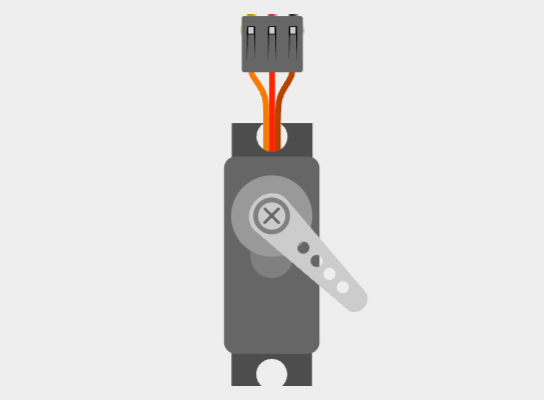
A servo has one lead with three wires, and on almost every servo power is the middle one. The colours vary between makers: brown, red and orange, as here, or black, red and white. The lead ends in a three-socket connector with 0.1 in (2.54 mm) spacing, so jumper wires plug straight into it.

| Turns | To an angle and holds it: about 0 to 180°, depending on the servo |
|---|---|
| Signal | A pulse every 20 ms; its length sets the angle, 1.5 ms is the usual neutral position |
| Supply | 4.8 to 6 V; one small servo can run from the Uno’s 5V |
| SG90 speed | 0.1 s per 60° at 4.8 V |
| SG90 stall torque | 1.8 kg·cm at 4.8 V |
| Library | Servo, which comes with the Arduino IDE |
You'll need
- An Arduino Uno (a Nano works the same way) and its USB cable
- A micro servo, such as the SG90
- A 10 kΩ potentiometer, the knob
- A breadboard and six jumper wires; three of them plug into the servo's connector
- Software to upload the sketch to the Uno: either Cirkit Designer, free in your browser, or the Arduino IDE, a free download for Windows, macOS and Linux
Wire it
Three wires for the servo, three for the knob.
Tap a connection to see it on the circuit.
Pin Connect to the Uno Show Servo ground (brown) GND Show Servo power (red, middle) 5V Show Servo signal (orange) Pin 9 Show Knob, one outer leg 5V Show Knob, middle leg A0 Show Knob, other outer leg GND Show One small servo can run from the Uno's 5V. For a bigger servo, or more than one, power them from a separate 5 to 6 V supply and join its ground to the Uno's GND.
Get the code
I'm using:Steps 2 and 3 follow the tool you pick.
The project opens with the sketch already in it, so there's nothing to install.
No Arduino IDE yet? Download it free for Windows, macOS or Linux.
The Servo library comes with the Arduino IDE, so there's nothing to install. Copy the sketch into a new one:
How it works line by line is in what the code does, above.
Upload and check it
Plug in your Uno. In Cirkit, open the Build tab, then Upload firmware: click Select Port and pick your Uno, then Upload to Device. The first time, Cirkit asks you to install Cirkit Create Agent, a small desktop helper that lets it reach the board over USB. Then open Upload output and serial monitor and click Start Serial Monitor.
Show me where to click in Cirkit
 Servo on an Arduino UnoDesignCodeSimulateBuildShare
Select a device port
Select the device port for uploading code and serial communications
COM3 (Arduino Uno)- Open Build
- Choose Upload firmware
- Click Select Port
- Pick COM3 (Arduino Uno)
- Click Upload to Device
- Open Upload output and serial monitor
- Click Start Serial Monitor
In the Arduino IDE, choose Arduino Uno and its port from the board menu, press Upload, then open the Serial Monitor and set it to 115200 baud.
Show me where to click in the Arduino IDE
servo_knob.ino// Turn the knob on A0: the servo on pin 9 follows it, // from 0 to 180 degrees. #include <Servo.h> const int KNOB_PIN = A0; const int SERVO_PIN = 9;
OutputSerial Monitor115200 baudCompiling sketch...
Sketch uses 3420 bytes (10%) of program storage space. Maximum is 32256 bytes.
Global variables use 231 bytes (11%) of dynamic memory, leaving 1817 bytes for local variables. Maximum is 2048 bytes.
Uploading...
A0=512 angle=90
A0=257 angle=45
A0=1023 angle=180
A0=0 angle=0
Done uploading.
- Click the board menu
- Pick Arduino Uno on COM3
- Click Upload
- Wait for Done uploading
- Click Serial Monitor
- Check it is set to 115200 baud
It works when:
- The horn follows the knob, from one end of its travel to the other.
- The Serial Monitor prints a line each time the angle changes, such as
A0=257 angle=45with the knob a quarter of the way round, as pictured. On real hardware the readings vary a little.
With the knob a quarter of the way round, the sketch writes 45° and the horn turns there. Device SerialA0=512 angle=90A0=257 angle=45A0=1023 angle=180A0=0 angle=0OutputSerial MonitorA0=512 angle=90A0=257 angle=45A0=1023 angle=180A0=0 angle=0Not working? See troubleshooting.
Troubleshooting
Find your symptom; the checks under it run from the most common cause down.
The servo doesn't move, but the Serial Monitor shows readings
The sketch runs, but its pulses don't reach the servo, or the servo has no power. Check, in order:
- The signal wire is on pin 9. It must be the pin
servo.attach()names. - The servo is wired by its colours. Power (red, the middle wire) to 5V, ground (brown or black) to GND.
- With a separate supply, the grounds are joined. The pulses mean nothing to the servo unless its ground is the Uno's ground.
The servo jitters, or the Uno resets when the servo moves
The servo is drawing more current than its supply can give, so the supply's voltage dips.
- Only one small servo runs from the Uno's 5V. A micro servo can draw a few hundred milliamps while it works hard; a standard servo such as the MG996R up to 2.5 A at 6 V. Give anything bigger, or a second servo, its own 5 to 6 V supply, with the grounds joined.
- The USB port or cable is up to it. A hub or a long, thin cable sags under load; try a port on the computer itself.
The servo buzzes or strains at one end
- The pulse range suits your servo. The Servo library's 544 to 2400 µs can push a servo against its own end stops. Narrow it with
servo.attach(9, 1000, 2000), then widen it until the horn reaches each end without straining. - Nothing blocks the horn. A servo that can't reach its angle keeps pushing, and draws its most current doing so.
The horn turns the opposite way to the knob
- The knob's outer legs are the other way round. Swap them, or reverse the angle in the code:
servo.write(180 - angle).
The servo spins round and round instead of turning to an angle
- It is a continuous-rotation servo. It looks like a positional one, but the pulse length sets its speed and direction, not an angle; this sketch needs a positional servo. See servo or something else.
analogWrite() stopped working on pin 9 or 10
- The Servo library uses them. On an Uno, attaching any servo turns off
analogWrite()on pins 9 and 10, whether or not a servo is on them. Use another PWM pin, such as 3, 5, 6 or 11, for the LED or motor.
Nothing in the Serial Monitor, or garbled characters
- The Serial Monitor is set to 115200 baud. It must match
Serial.begin(115200)in the sketch. - The sketch prints only when the angle changes. It prints once at the start; turn the knob to see more.
How a servo works
Inside the case are a small motor, a gearbox that slows it down and makes it stronger, and a potentiometer on the output shaft that tells a little control board where the shaft is. The board compares that with the angle the pulses ask for and drives the motor until they match.

The pulses come about 50 times a second, every 20 ms with the Servo library, and their length is the whole message: 1.5 ms is the usual neutral position, and shorter pulses turn it one way, longer ones the other. Below is the signal this guide's sketch sends.
Every 20 ms, one pulse
One pulse, zoomed in: its length sets the angle
Horn at 90°, pulse 1472 µs
The Servo library sends 544 µs for 0° and 2400 µs for 180° unless you give attach() other limits; servos differ, so your servo may need a narrower or wider range for its full travel.
servo.write(angle) turns an angle into a pulse length within the range attach() set; servo.writeMicroseconds(1500) sends a pulse length directly. And servo.read() returns the last angle you wrote, not where the horn is: the servo has no wire to say where it got to.
Speed, strength and other limits
| A micro servo such as the SG90, on an Uno | |
|---|---|
| Travel | About 0 to 180°; each servo's end points differ, so the exact pulse lengths for its ends do too. |
| Speed | 0.1 s per 60° at 4.8 V, so about 0.3 s for a 180° turn. |
| Strength | Stall torque 1.8 kg·cm at 4.8 V: the most it can push before it stops, the same as 1.8 kg at 1 cm from the shaft or 0.18 kg at 10 cm. Loads that heavy stall it. |
| Current | Stalled, a micro servo draws a few hundred milliamps. Idle, with nothing to push against, a servo draws from a few dozen to one or two hundred milliamps; holding a load takes more, up to its stall current. The SG90's datasheet gives no current. |
| Smallest step | The SG90 ignores a change of less than 10 µs in the pulse, its dead band: about 1° with the library's default range. |
| Position | The sketch can't read where the horn is; read() gives back the last angle written. |
| How many | Up to 12 servos on an Uno. Attaching a servo turns off analogWrite() on pins 9 and 10. |
For loads near its limit, use a bigger servo with its own supply. To move more slowly than the servo's top speed, step the angle a degree at a time:
// Move one degree at a time, 15 ms apart: about 2.7 s
// from 0 to 180 degrees.
for (int angle = 0; angle <= 180; angle++) {
  servo.write(angle);
  delay(15);
}
Servo or something else?
| Moves | Strength and speed | Power | Choose it for | |
|---|---|---|---|---|
| Micro servo, such as the SG90 | To an angle, about 0 to 180°, and holds it | Stall torque 1.8 kg·cm, 0.1 s per 60° at 4.8 V; 9 g | One runs from the Uno's 5V | Pointers, flaps and small arms: this guide |
| Standard servo, such as the MG996R | To an angle, about 120° by its datasheet | Stall torque 9.4 kg·cm, 0.17 s per 60° at 4.8 V; 55 g | 4.8 to 7.2 V, up to 2.5 A when stalled at 6 V: its own supply | Heavier loads, such as a robot arm's joints |
| Continuous-rotation servo | Round and round; the pulse length sets speed and direction | As a positional servo of its size | As a positional servo of its size | Small wheels, with no extra driver board |
| Stepper motor | In fixed steps, as many turns as you like | Depends on the motor and driver | Its own supply, through a driver board | Exact positions beyond one turn, such as a dial or a slide |
A continuous-rotation servo looks just like a positional one; the listing says which. It can't turn to an angle. A pulse of 1.5 ms stops it when it is calibrated to; many have a small trimmer for that. Pulses further from 1.5 ms make it spin faster, shorter one way and longer the other. Stop it with writeMicroseconds(1500): with the library's default range, write(90) sends 1472 µs, which may leave it creeping.
Servo FAQ
Can I run a servo from the Uno's 5V pin?
One small servo, yes. For a second servo, or a big one, use a separate supply, with its ground joined to the Uno's GND; the Servo library's own notes say the same for more than one or two. See jitter and resets.
How do I control two servos?
Make a Servo object for each and attach each to its own pin: left.attach(9), right.attach(10). An Uno can run up to 12; give them their own supply.
Why does my servo buzz at 0° or 180°?
The library's default pulses can ask for more travel than your servo has, so it pushes against its end stop. Give attach() a narrower range; see buzzing at one end.
Which servo wire is which?
Power is the middle wire, usually red. Ground is brown or black, and signal is orange, white or blue. See the pinout.
Can a servo turn 360°?
An ordinary hobby servo turns about 180° at most; its potentiometer and end stops limit it. Multi-turn servos, a rarer kind, go to positions over one or more full turns. A continuous-rotation servo turns round and round, but can't go to an angle. See servo or something else.
What's the difference between write() and writeMicroseconds()?
write() takes an angle and turns it into a pulse length; writeMicroseconds() takes the pulse length itself, for finer control or a servo whose range you've measured.
Simulating the servo in Cirkit Designer
Cirkit's servo is a generic positional servo. It measures each pulse on its signal pin, as a real servo's control board does, and turns its horn to the matching angle, so the same code runs on hardware. It moves only with 4 to 6 V between its power and ground pins, the simulator's window for a small servo. It is tested on the Arduino Uno, the ESP32-S3 and the classic ESP32.
Where it differs from a real servo: the horn reaches its angle at once, with no speed, torque, load or current, and no end stops. On real hardware, give the servo time to move, and its own supply for anything bigger than a micro servo.
References
- Arduino Servo library, version 1.3.0 (its readme and docs: wiring, power, 12 servos, pins 9 and 10, read())
- Arduino_BuiltIn: the libraries that come with the Arduino IDE, Servo among them
- Arduino's Knob example, in the Servo library
- Pololu: gettin' all up in your servos (what's inside)
- Pololu: electrical characteristics of servos (wires, supply, current, pulses)
- Pololu: the servo control interface in detail (neutral, pulse range)
- Pololu: continuous-rotation servos and multi-turn servos
- Tower Pro SG90 datasheet (hosted by Rapid Electronics)
- Tower Pro MG996R datasheet (hosted by Cornell University)
- Arduino Stepper library